
Reference: This article should be read alongside the Scheduling data updates article, where we cover many more important concepts and decisions about scheduling updates to data.
We have prepared a series of guides for data publishers that provide a step-by-step technical walkthrough of scheduling updates to your data through data.wa.gov.au’s Data Upload Tool.
Each guide covers:
- Preparing your data for ingest through DUT
- The software requirements for uploading data
- Step-by-step instructions detailing how to perform an upload
- Guidance about scheduling uploads to automate the process of uploading data
Introduction
We recognised that many data custodians manage multiple datasets that are constantly being changed and it is for this reason custodians would like a level of automation to keep the data hosted in the Data Upload Tool up to date. This guide will go over how to use the Amazon Command Line Tool to automate data uploads to the Data Upload Tool.
Requirements
- This documents only goes over the steps to compress and upload your data to the Data Upload Tool. How to export your data from your internal systems is not covered.
- A dataset must already have been loaded into the Data Upload Tool and the application approved.
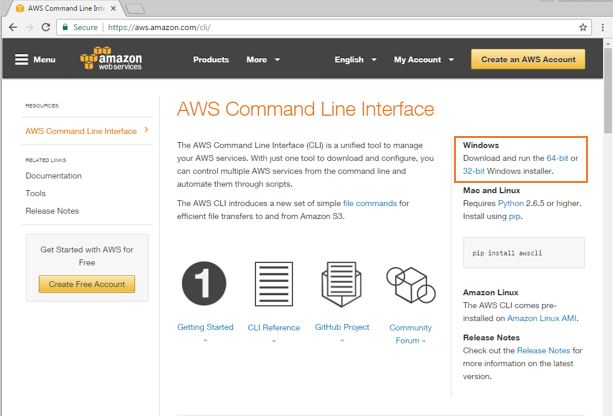
- Amazon CLI Tool installed. https://aws.amazon.com/cli/.
- Have access to the Data Upload Tool AWS S3 Access ID, Secret Key and Bucket Details.
Installing Amazon CLI Tool
Install Amazon CLI to workspace. Navigate to https://aws.amazon.com/cli/ and download the 32-bit or 64-bit Windows installer:
Run the installer.
Configuring the CLI credentials
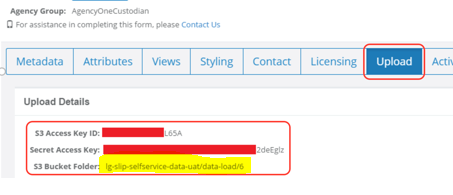
Log onto the Data Upload Tool and navigate to the upload tab to retrieve the AWS credential details.

Open a DOS prompt on the desktop and enter the following to create a UAT Data Upload Tool profile:
aws configure –profile SLIP_SS_UAT
When prompted, enter AWS Access Key ID.
When prompted, enter AWS Secret Access Key.
When prompted, enter the Default region name = ap-southeast-2:

Repeat the process to configure the PROD Profile:
aws configure –profile SLIP_SS_PROD

The AWS credentials are now stored in a .aws folder located in the logged in users home directory:
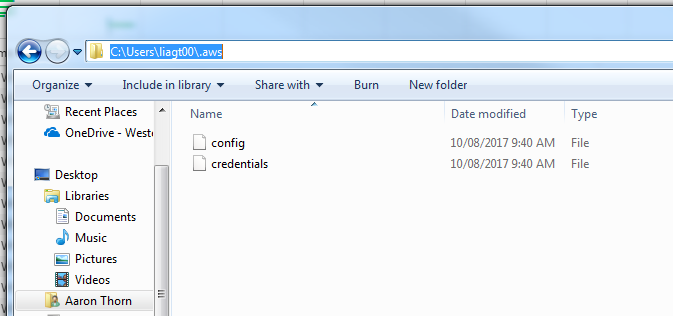
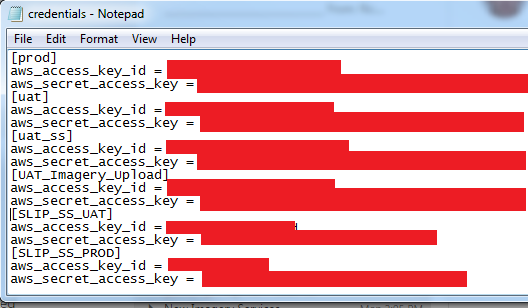
Open the credentials file to check that the profiles have been configured correctly:
Optimise CLI copy speed (Optional for large datasets)
Type the following commands into a DOS window to optimise the copy speeds:
aws configure set default.s3.max_concurrent_requests 25
aws configure set default.s3.max_queue_size 10000
aws configure set default.s3.multipart_threshold 64MB
aws configure set default.s3.multipart_chunksize 16MB

CLI has now been configured for this computer.
Zipping your data using the command line
The current version of the Data Upload Tool only supports the following spatial formats
- ESRI Shapefiles ,
- ESRI file geodatabase (limited to one feature class per FGDB). Subtypes and database domains are not supported.
The name of the shapefile or “feature class name” must match the name used during the registration of the dataset in the Data Upload Tool.
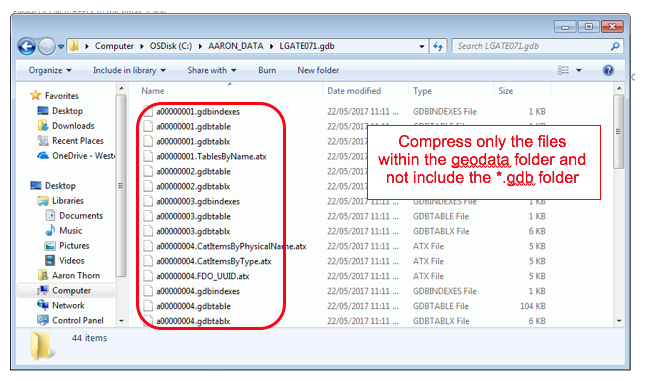
Before updating your data into the Data Upload Tool the dataset must be compressed into a single zip file. ESRI filegeodatabase zip files must only contain the is the contents of the file geodatabase folder and not include the folder itself, ie:
There are a number of 3rd party command utilities that can create zips files from a command prompt (ie. 7Zip, WinZip or WinRAR). This document will go over the winzip option.
Compress the File Geodatabase using the zip command line
Test that your system has zip installed by opening and DOS command prompt and type in zip:
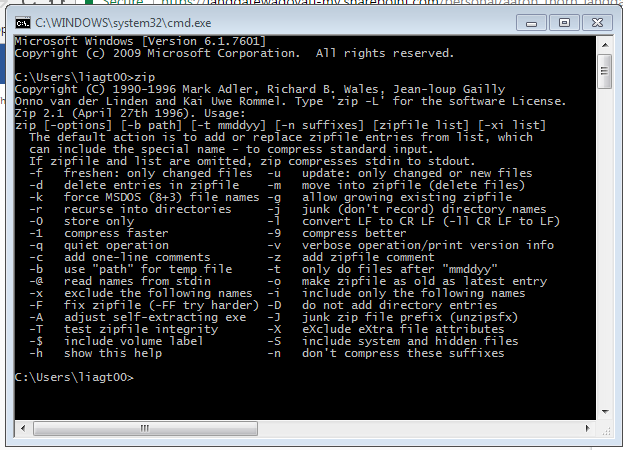
If the zip command is not recognised consult your system admin or install 7Zip.
Open note pad and cut and paste the following lines:
: Date stamp the name of the zipfile
set ZIPFILE=LGATE071_%date:~10,4%_%date:~7,2%_%date:~4,2%-%TIME:~0,2%h%TIME:~3,2%m.zip
: path to exported file Geodatabase folder
set FGDB=C:\AARON_DATA\______\zip_test\LGATE071.gdb
: path to Output the zip file
set ZIP_PATH=C:\AARON_DATA\slip_upload_test\
: Use the winzip command tool to compress
zip -j -9 %ZIP_PATH%%ZIPFILE% %FGDB%\*
pause
Edit the red highlighted parameters as required and save the file with an extension of either *.bat or *.cmd:

Test the batch by double clicking your batch file:

The results should look similar to the below:
A zip file with a date stamp should also be created:

Compress a shapefile using the zip command line
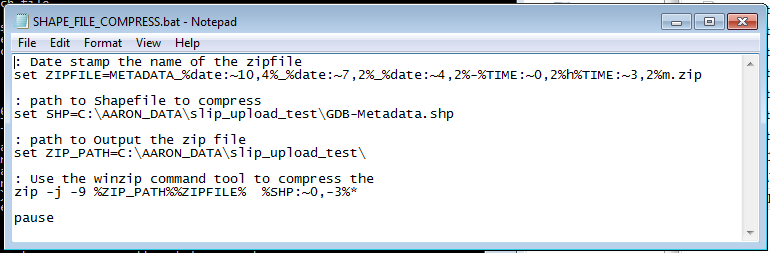
Open a note pad and cut and paste the following lines:
: Date stamp the name of the zipfile
set ZIPFILE=METADATA_%date:~10,4%_%date:~7,2%_%date:~4,2%-%TIME:~0,2%h%TIME:~3,2%m.zip
: path to Shapefile to compress
set SHP=C:\AARON_DATA\slip_upload_test\GDB-Metadata.shp
: path to Output the zip file
set ZIP_PATH=C:\AARON_DATA\slip_upload_test\
: Use the winzip command tool to compress
zip -j -9 %ZIP_PATH%%ZIPFILE% %SHP:~0,-3%*
pause
Edit the red highlighted parameters as required and save the file with an extension of either *.bat or *.cmd:
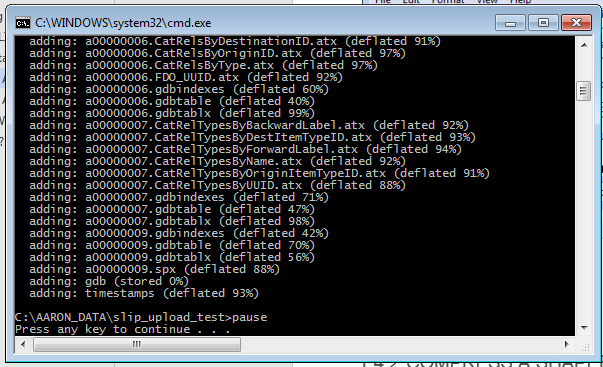
Test the batch by double click your batch file:

The results should look similar to the below:

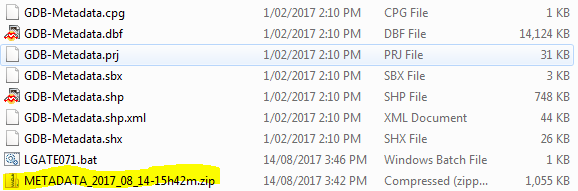
A date stamped zip file should also be created in the output folder:
Uploading to AWS using the command line
Log into the Data Upload Tool and click the upload tab to display your agencies S3 Bucket path. This is the location the Data Upload Tool is set up to look for new data updates.
To upload a new version of a single dataset to the S3 Bucket Folder can be done using the following cli command:

aws s3 cp LGATE071.zip s3://lg-slip-selfservice-data-uat/data-load/6/ --profile SLIP_SS_PROD --debug 2>LGATE071_upload_logs.txt
If the upload was successful a event will be added in the Upload Events log.

The next step is now automating the upload command to run at the desired frequency. Add the following line to zip batch:
: Set Bucket Path
set AWSBUCKET=s3://lg-slip-selfservice-data-uat/data-load/6/
: Set AWS path
set AWSPROFILE=SLIP_SS_UAT
: upload the ZIP FILE to the AWS
aws s3 cp %ZIP_PATH%%ZIPFILE% %AWSBUCKET% --profile %AWSPROFILE% --debug 2>%ZIP_PATH%%ZIPFILE%.log
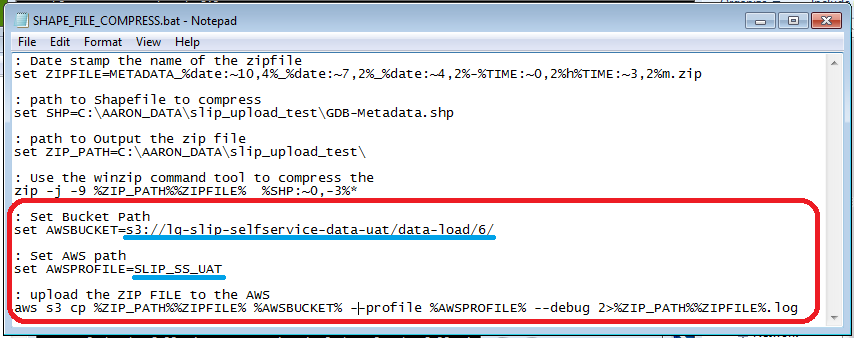
Modify the AWS bucket and the AWSProfile as required and save the file.
Next configure task scheduler to manage the execution times of the batch file.
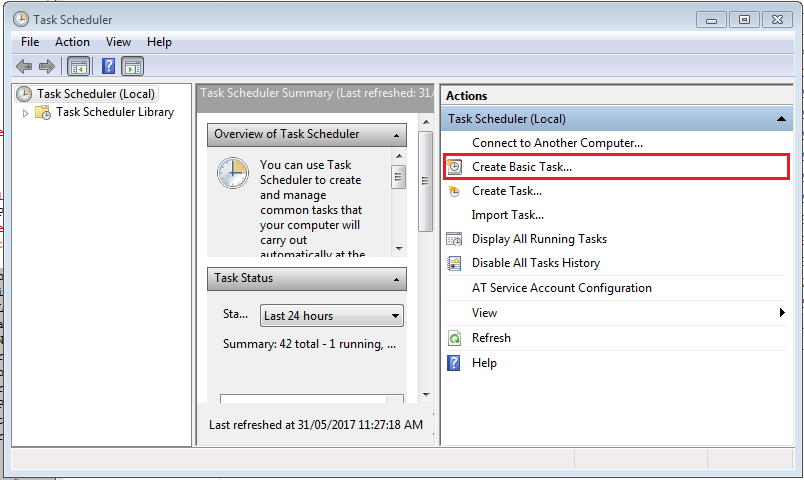
Scheduling
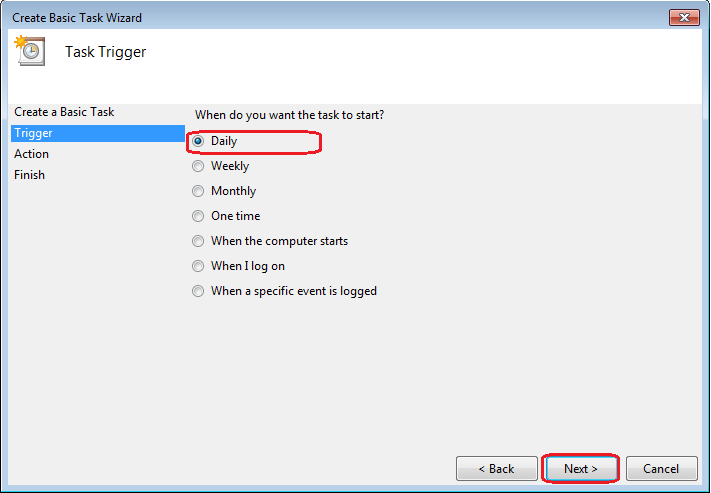
To schedule this job to run at regular intervals open Windows Task Scheduler and select create basic task:
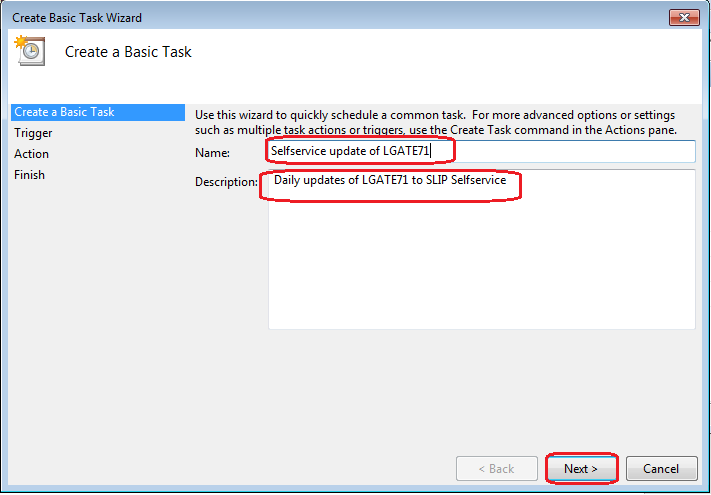
Type in a meaningful task name and description.
Select how often you want the task to run:
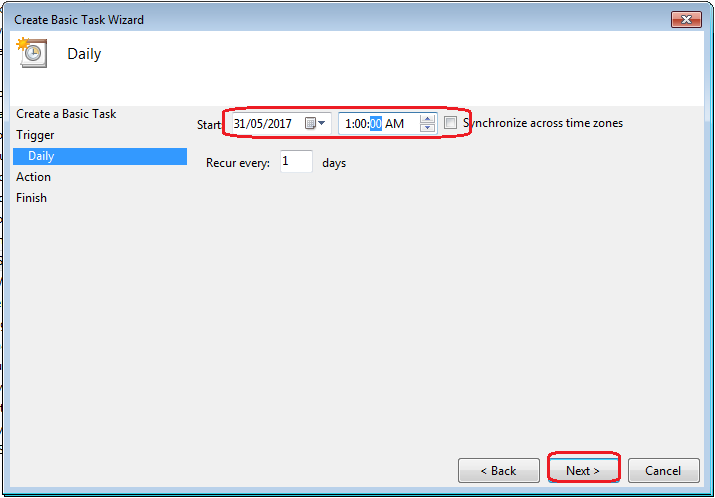
Enter what time you want to execute the task:
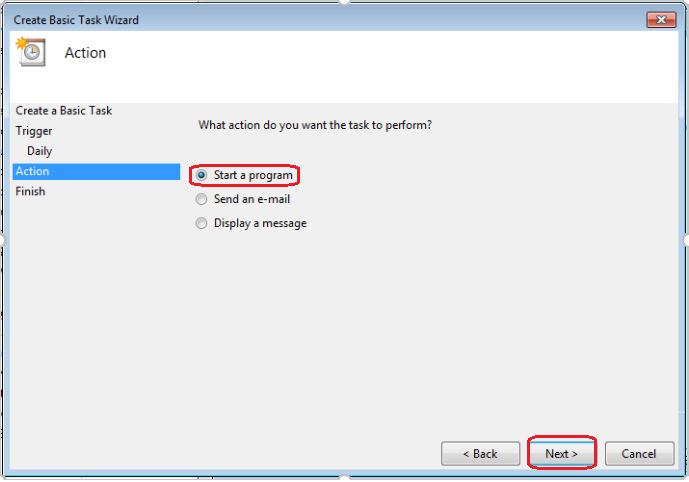
Select Start a Program:
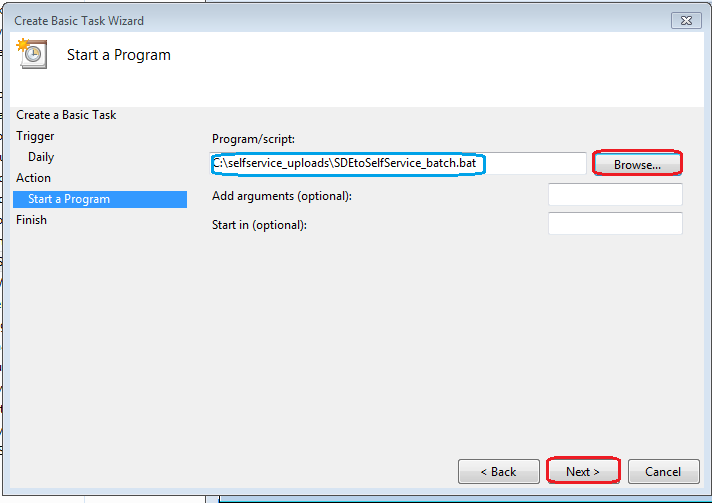
Navigate to your batch file:
Your newly created task will now be shown in the task scheduler Library:
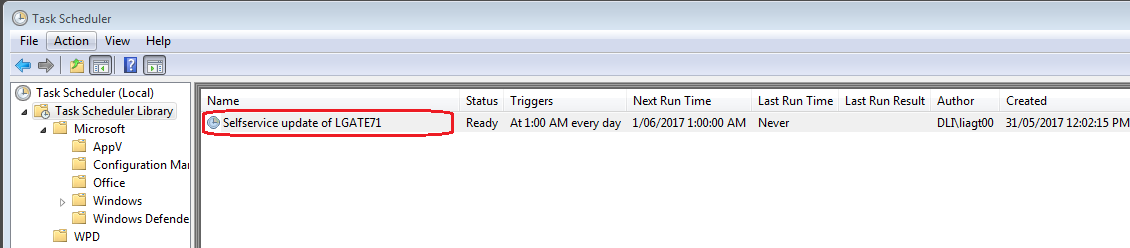
Right click on your task and select properties:

Configure the security options. Note if your account password expires the task will not execute. It is recommended to use a service account that’s password never expires.
Need more help?
AWS CLI user guide: http://docs.aws.amazon.com/cli/latest/userguide/cli-chap-welcome.html
Windows Schedule Tasks: https://msdn.microsoft.com/en-us/library/windows/desktop/aa383614(v=vs.85).aspx
Appendix
Batch example for shapefile:
Batch example for FileGDB: